EDC Photography:
Part 6: Post-Processing – HSL
Series Contents:
-
Introduction
-
Part 1: Composition
-
Part 2: Lighting
-
Part 3: Color
-
Part 4: Post Processing – Global Adjustments
-
Part 5: Post Processing – Local Adjustments
- Part 6: Post Processing – HSL (You’re Here!)
In the last two chapters we talked about the advantages and disadvantages of global and local adjustments. However there is one hybrid that cannot clearly be classified as global or local adjustments: the HSL sliders. Let me tell you why – or what it is in the first place.
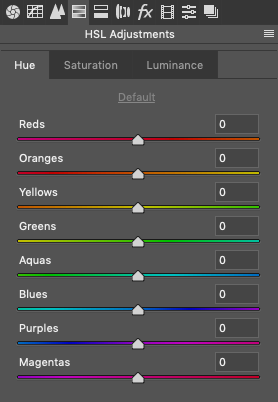
HSL stands for Hue, Saturation and Luminance. In chapter 2 (Lighting) and 3 (Color) we talked about every pixel having a certain hue, saturation, and luminance. These Sliders let you manipulate every aspect of it individually.
The reason I said this was a hybrid is that with these sliders you can pinpoint very specific colors but they will affect all areas of the image with that same color. This makes the HSL sliders a very powerful tool with which you can achieve pretty dramatic changes very easily.
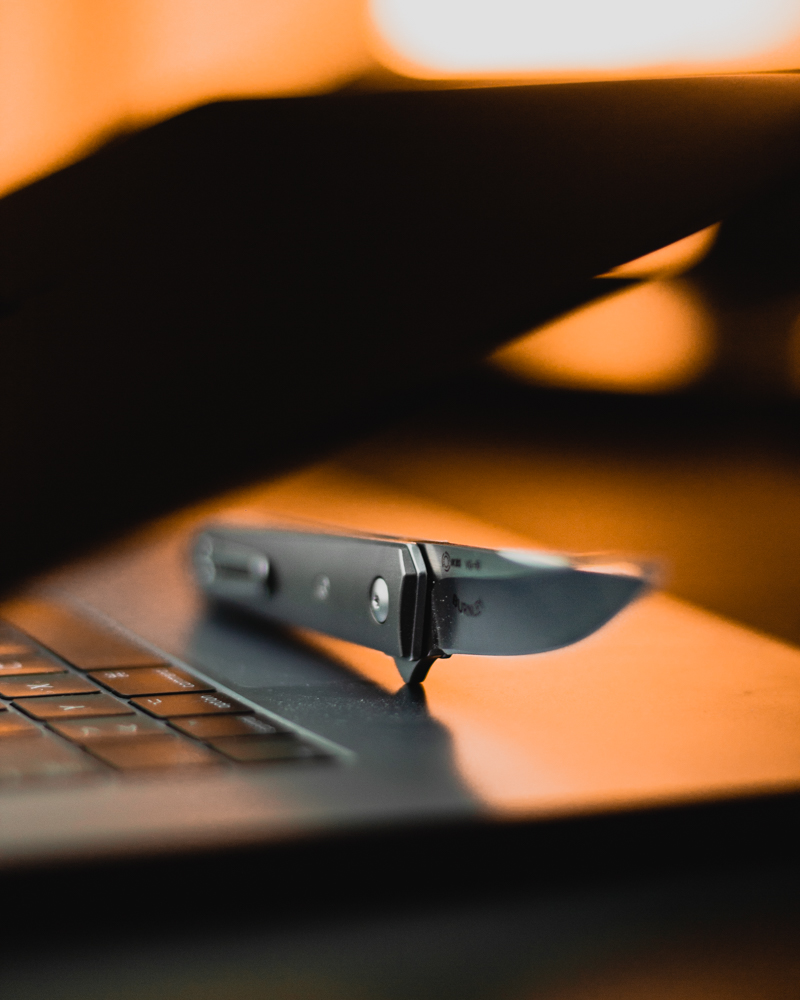
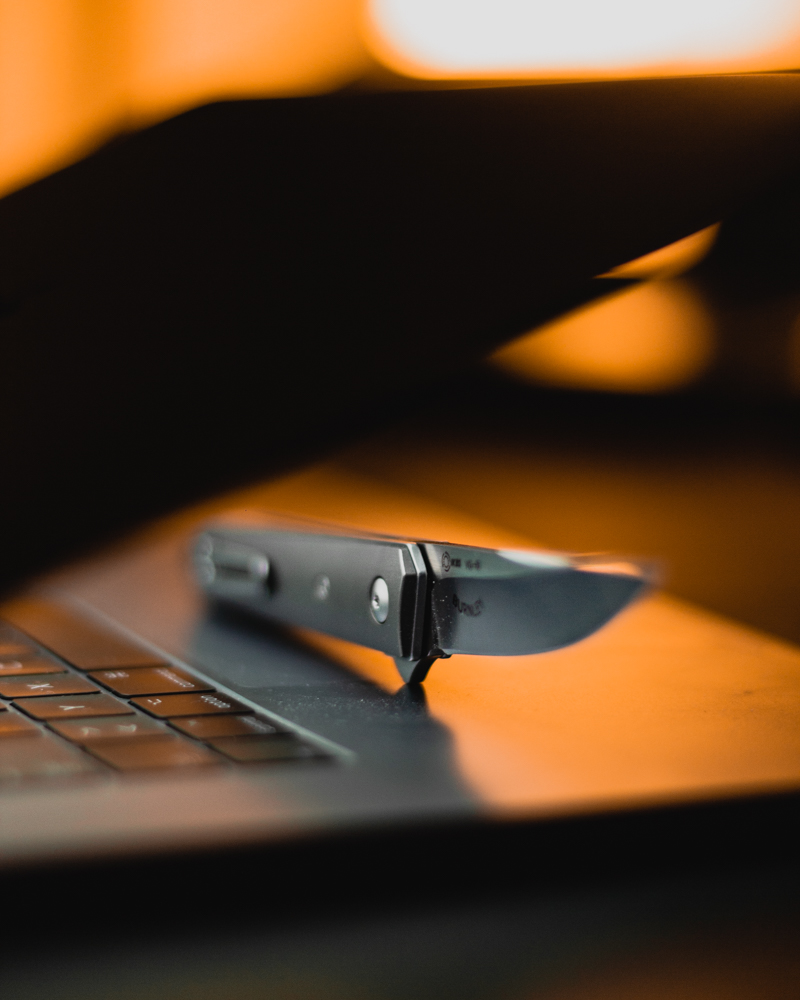
Take the following image for example. For my taste, it’s too yellow and there is this weird green tint in the foreground and on the knife’s handle that’s being created by the wallpaper on the laptop’s screen.
Image by @raven_the_pirate
Image by @raven_the_pirate
Image by @raven_the_pirate
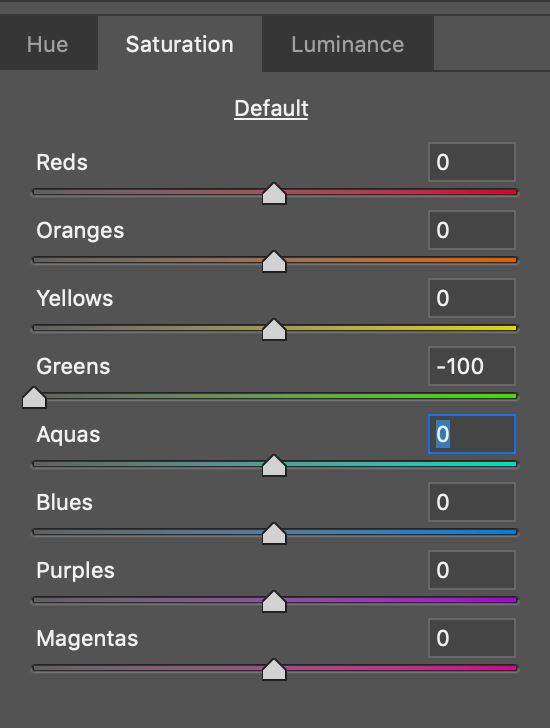
I like to start on the Saturation tab to take out any color I don’t like. In this case, I reduced the greens to -100 to get rid of that green tint.
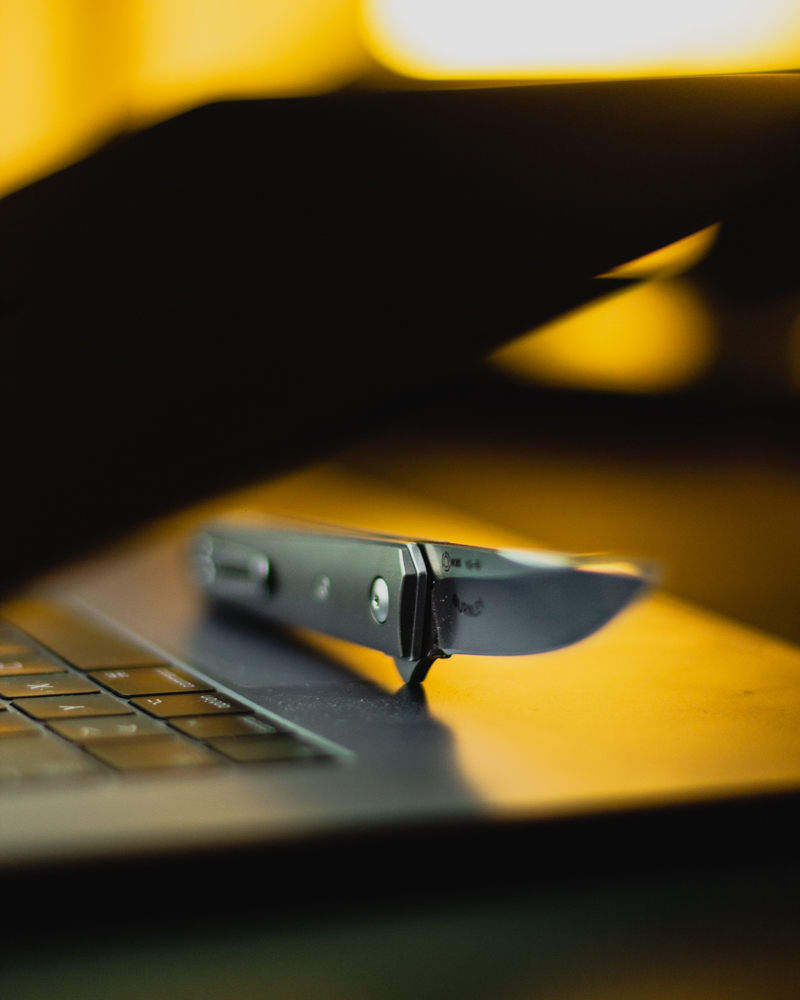
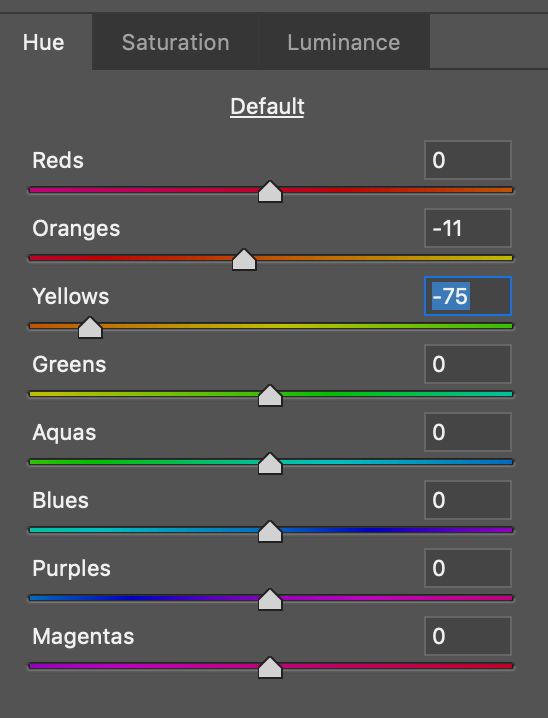
Now it’s time to address the yellows.
Image by @raven_the_pirate
Image by @raven_the_pirate
Image by @raven_the_pirate
To change the hues, I switched over to the (you guessed it) Hue tab and shifter the yellows towards orange and the oranges more towards red. This gives the image a warmer, more cozy tone without touching the colors of the knife or the laptop, and most importantly: without having to create selections.
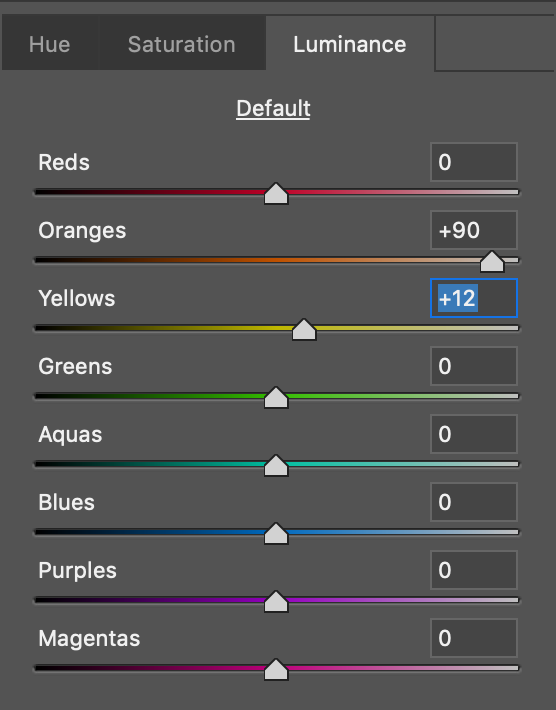
Now I want to raise the brightness of the orange glow to make it pop a bit more.
Image by @raven_the_pirate
Image by @raven_the_pirate
Image by @raven_the_pirate
I switched to the Luminance tab and used the orange and yellow slider again to adjust the luminance accordingly. This makes the background glow a little bit more interesting and gives it a few more layers, instead of it being an orange blob.
Image by @raven_the_pirate
Image by @raven_the_pirate
As you can see, the HSL sliders can change your image very drastically very quickly. I mostly use it to change colors in a way that is more pleasing for the eye (see chapter 3 – Colors).
Sometimes you’re shooting outdoors and you can’t just move the car out of the way, just because the color doesn’t fit your shot. But you can use the HSL sliders to change its color afterward.
The HSL sliders are an integral part of my workflow, even if it’s small tweaks, but it makes all the difference.
Final Words from Sam:
I hope that these articles helped you understand a bit more about the technical aspect of photography and how you can use it to improve your own style.
The most important thing, that I hope you could take away from this, is that you don’t need fancy gear, an expensive camera or even software to edit your photos. It’s just knowing what to look for and how to achieve your vision. Just like your knife is a tool to help you achieve everyday tasks, photography is also just a tool to visualize animage that otherwise had only existed in your imagination.
If you’re using any of these tips in your photos, feel free to tag me (@raven_the_pirate) in them, I would love to see how you’re utilizing this knowledge. I hope you enjoyed this series! I had fun sharing a bit of my thought process and look forward to what you’ll come up with!
Editors Note:
This is the end of Samson’s EDC photography series (for now). Take what you’ve learned and apply this to your EDC photos and submit them via the button below. Novel Carry is always looking for stellar content to share. Coming very soon, we will start to feature creators and EDC enthusiasts like you weekly.