EDC Photography:
Part 4 – Post-Processing – Global Adjustments
Series Contents:
-
Introduction
-
Part 1: Composition
-
Part 2: Lighting
-
Part 3: Color
- Part 4: Post Processing – Global Adjustments (You’re Here!)
-
Part 5: Post Processing – Local Adjustments
-
Part 6: Post Processing – HSL
What in the world is post-processing? It’s really just a fancy word for editing. In this part of the EDC photography series we’ll cover some steps you can take to further enhance or manipulate your image after you pressed the shutter button and took the shot.
In this part, I’m going to use Adobe Lightroom / Camera Raw, but the majority of editing software will have similar options and features. Side note: I’m not trying to explain how the program works. I’ll just address some tweaks you might want to do and how you would do that with editing software.
Why would you need to edit an image in the first place?
For me photography is an art form that lets me realize an idea I have in mind. If I can’t realize that idea to 100% with photography alone, then post-processing is just another tool to help me get there.
Let’s say you have a nice composition, the frame is filled with supporting elements, you have chosen a great color palette that ties everything together and you used a soft, flattering light to light the scene. Everything looks very good, except you wished the image was just a little bit brighter. Crap. Now you have to set everything up again, take your camera out, wait for the sun to come out and hope that it’s a bit brighter this time. Oooor you could use a little editing.
Adjusting Exposure
The exposure slider will let you adjust the exposure of your image just like a camera would.

Special note: Some programs have a separate brightness slider which sounds similar but does a slightly different thing. The brightness slider will take your image as it is and shift its entire brightness level up or down equally, which can look fake because that’s not how light works. Where on the other hand, using the exposure slider will affect the brightness in a more natural way, as if the light source had been actually brighter (or darker).
A Few Notes About Shooting in RAW
Now is a good time to address an important issue: You can’t recover information that has not been captured.
What do I mean by that? Let’s imagine your photo as a collection of information. There’s information on how bright things are, what color they have, how saturated they are, etc. If you were to visualize that on a graph it would look something like this:
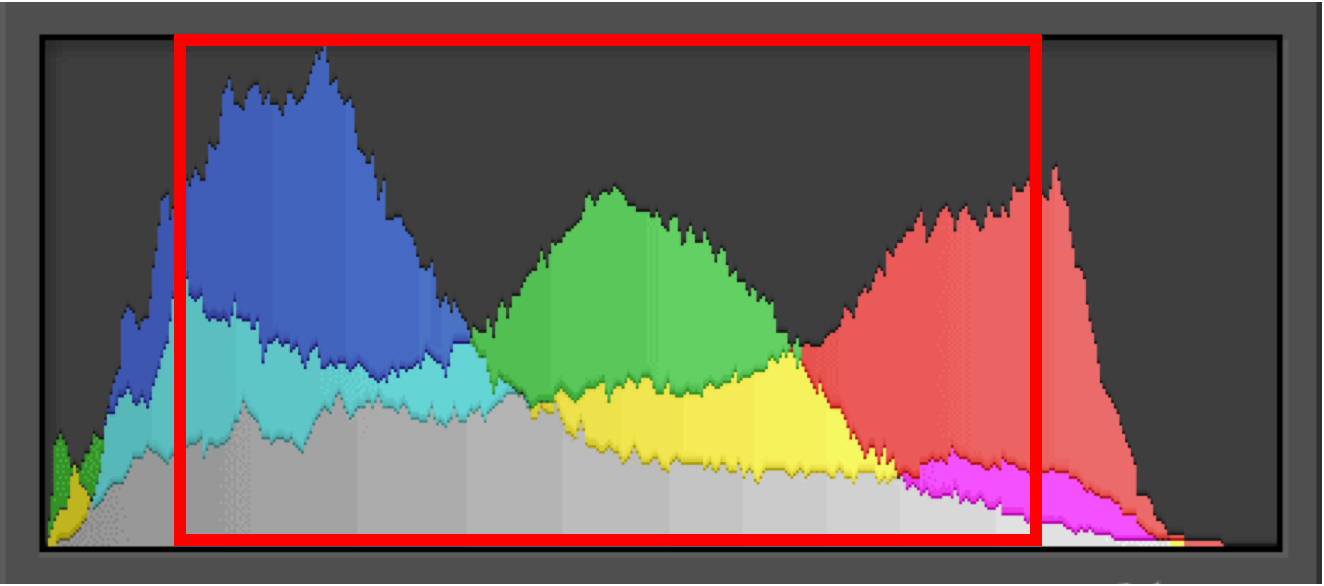
Depending on your camera and the format you’re shooting in, you may capture way more information than the final image is able to portray (the red square is supposed to show the information that an image is capable of showing). What this allows you to do is have more possibilities to edit your image after the fact. If one area is too dark you could adjust the exposure slider and might be able to reveal something that has been pitch black before.
Shooting in RAW (instead of JPEG) allows your camera to deliver a file that contains all this information. If you’re not shooting in a format that allows you to capture all the information you will not be able to recover that information, because it’s not there in the first place. Instead, the camera will cut off everything that is outside that red square to reduce file size. If you then slide your exposure slider up, there will be no additional information that you could pull into that red square.
Why is this important to know? That is important because you should be aware of the possibilities you’ll have (or won’t have) in post right there when you take the shot.
Dealing with Shadows and Highlights
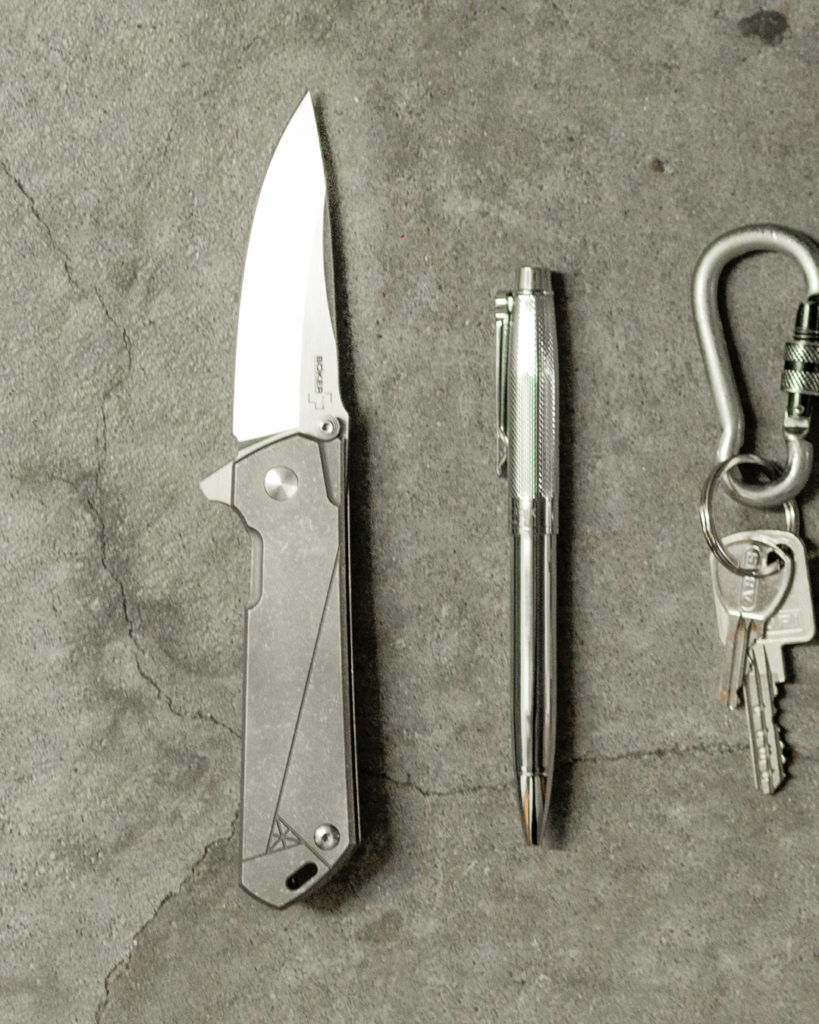
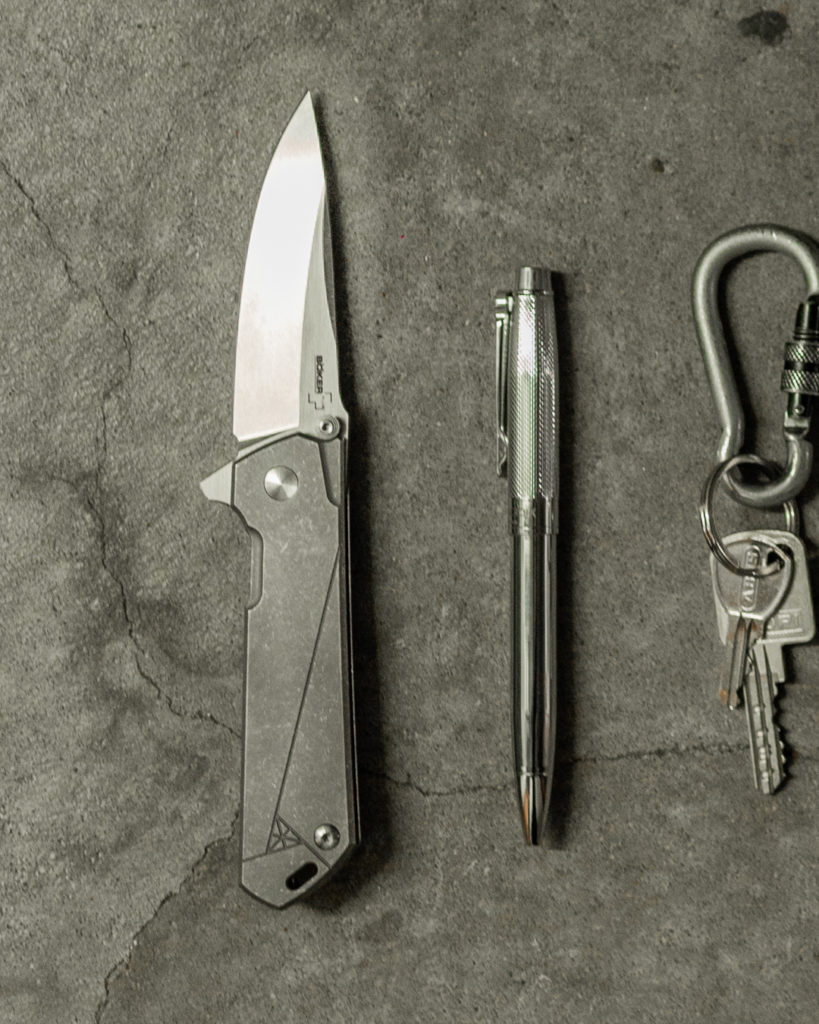
One issue that most of us have when trying to take a shot of our beloved knife is to get rid of a bright reflection on the blade. If you expose for the shiny blade, everything else will be too dark. Conversely, if you expose for the blade’s surroundings the knife will be overexposed. So, how do we deal with that?
The easiest thing is to find a different angle to shoot from or to position the knife so that the light source won’t reflect off the blade into your camera. Another way to deal with it is to use the Highlight slider in Lightroom.
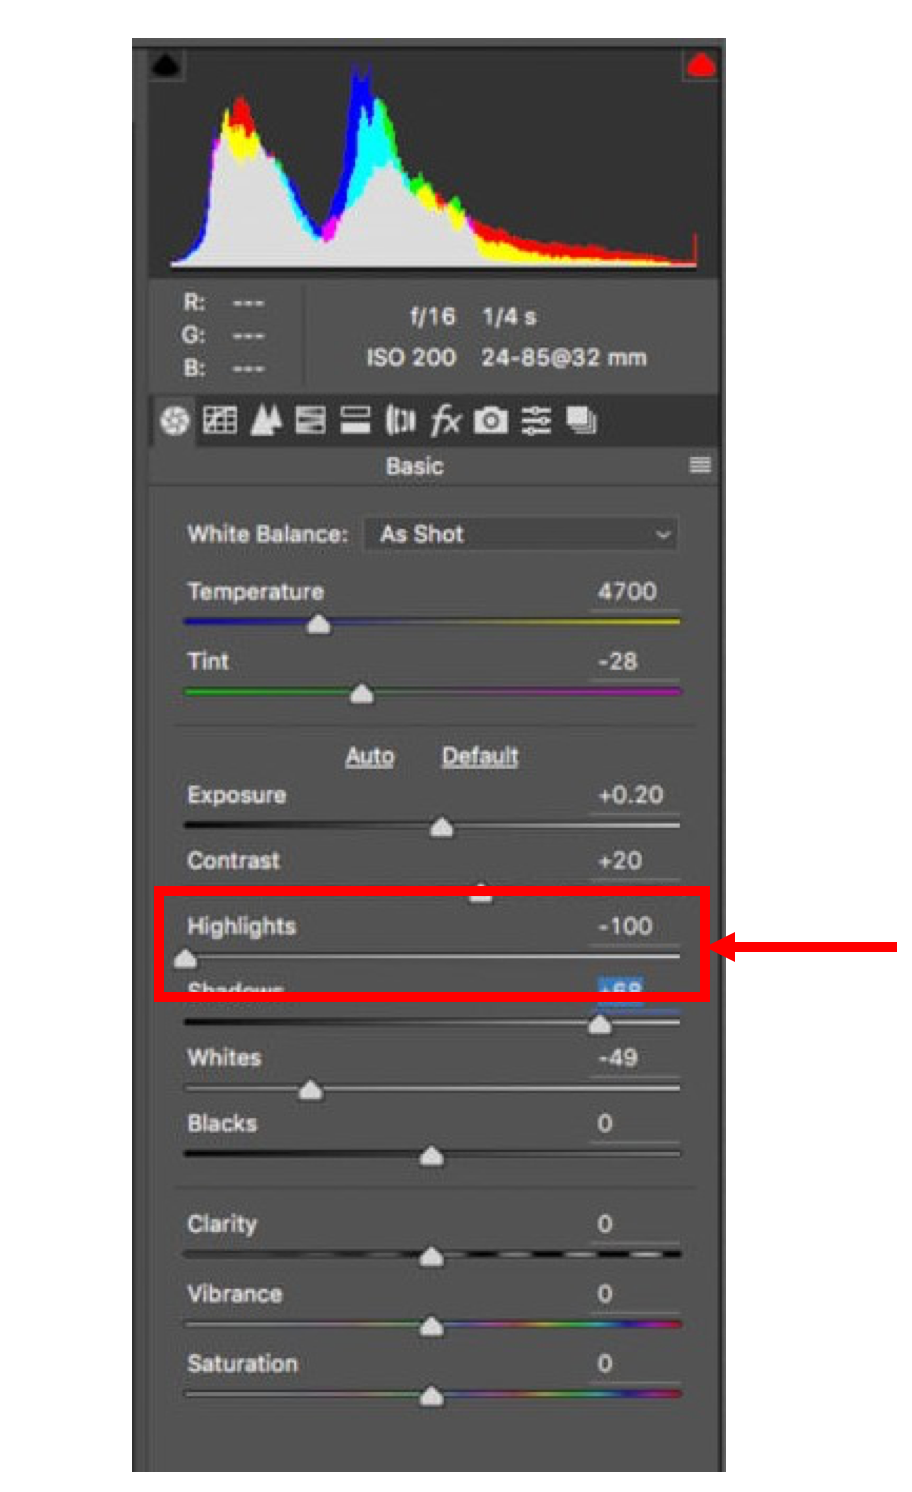
This slider allows you to manipulate the bright parts of an image exclusively while leaving the darker parts alone. So, if your blade is too bright you can just drag that slider to the left and it will reduce the brightness levels of the blade (and other highlights) and make the image more evenly lit.
Photo by: @raven_the_pirate
Photo by: @raven_the_pirate
The same works the other way round too: if you’re taking a shot of your challenge coin and it just doesn’t look as shiny and bright as you would like it to be, try dragging the Highlight slider to the right to enhance the bright reflections on the coin and make them more prominent.
The Shadow slider works in the exact same way for the dark areas of the image. It’s a great way to fix the shadow areas and make them a bit brighter without influencing the rest of the image.
Using both sliders in combination is also a great way to add contrast to your image. Contrast is nothing more than the difference between light and dark, so increasing the highlights and decreasing the shadows will add contrast to your image. “But isn’t that what the contrast slider is for?” you may ask. Yes, but I find that using the Highlight and Shadow sliders gives you way more precision since you can control both values separately to dial in the exact value you need.
Fixing Color
Another thing we all struggle with is color accuracy. You’ve all seen it: when you shoot late at night at home with the desk lamp as your only light source the image has this yellow tint. Sometimes it’s wanted but most of the time it just looks weird. The clean titanium handle of your knife doesn’t look so clean anymore, it almost looks dirty; and your beautiful blue hank now looks green. The colors are not being represented accurately anymore.
A very easy way to fix that is by using the Temperature slider.
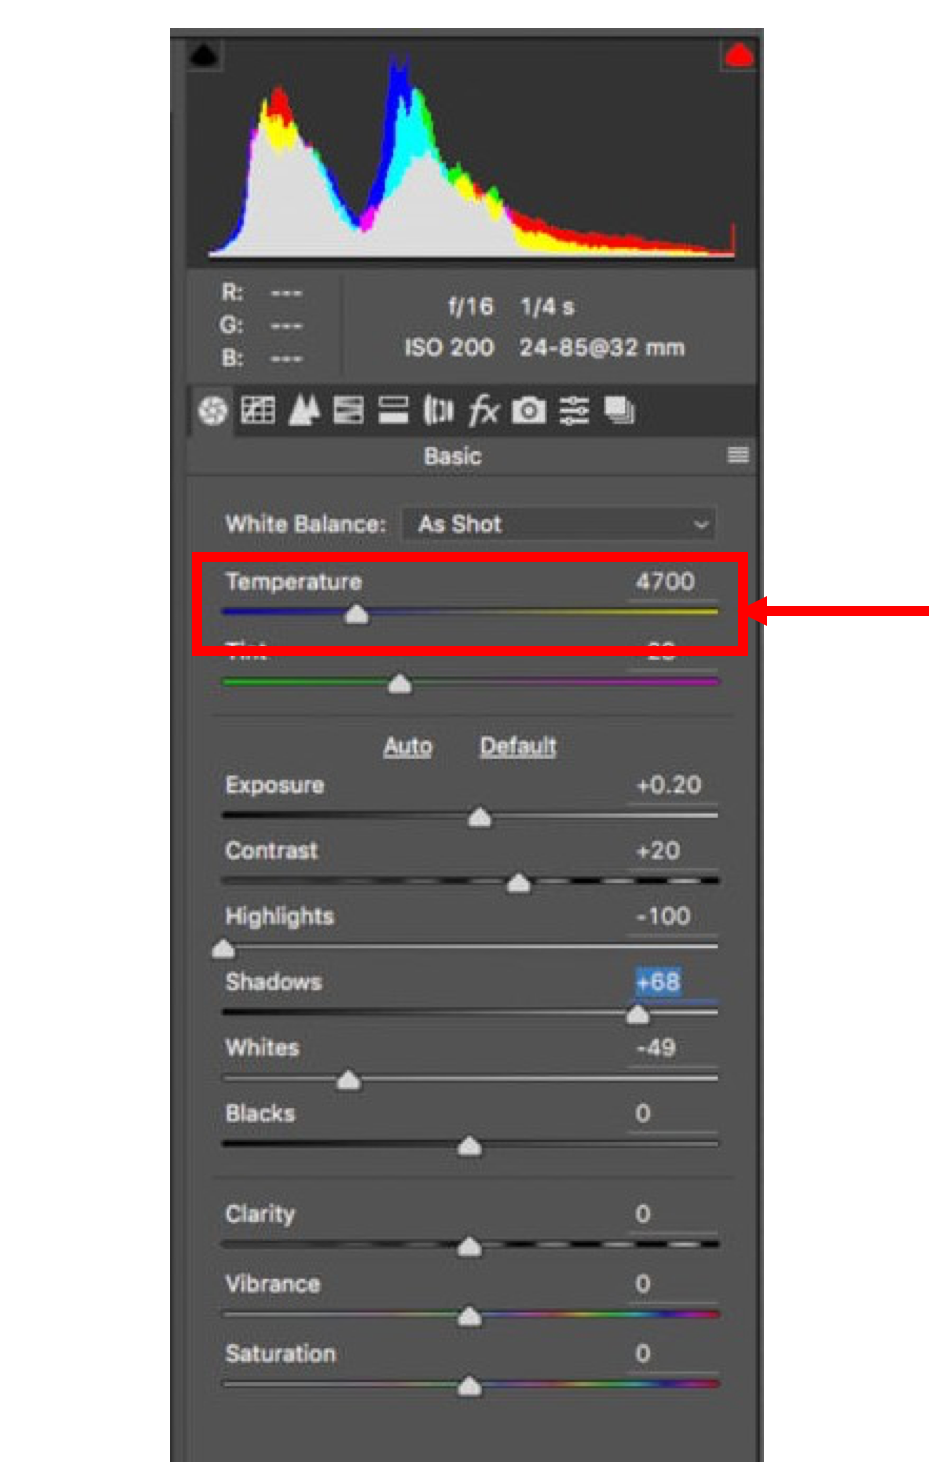
This slider lets you shift the temperature (or warmth) of your image. You can use that to counteract the effect of a yellow desk lamp to make your image look neutral again.
Image by @raven_the_pirate
Image by @raven_the_pirate
You could also use that slider to give your image an artistic look and shift it towards a certain color on purpose. Let’s say you took an image in perfect neutral lighting but you would like to make it look as if it was taken at sunset; you can do that with this slider very easily. Just drag it to the right (toward red) and your image will be much warmer.
Top Tip: Clarity is Awesome
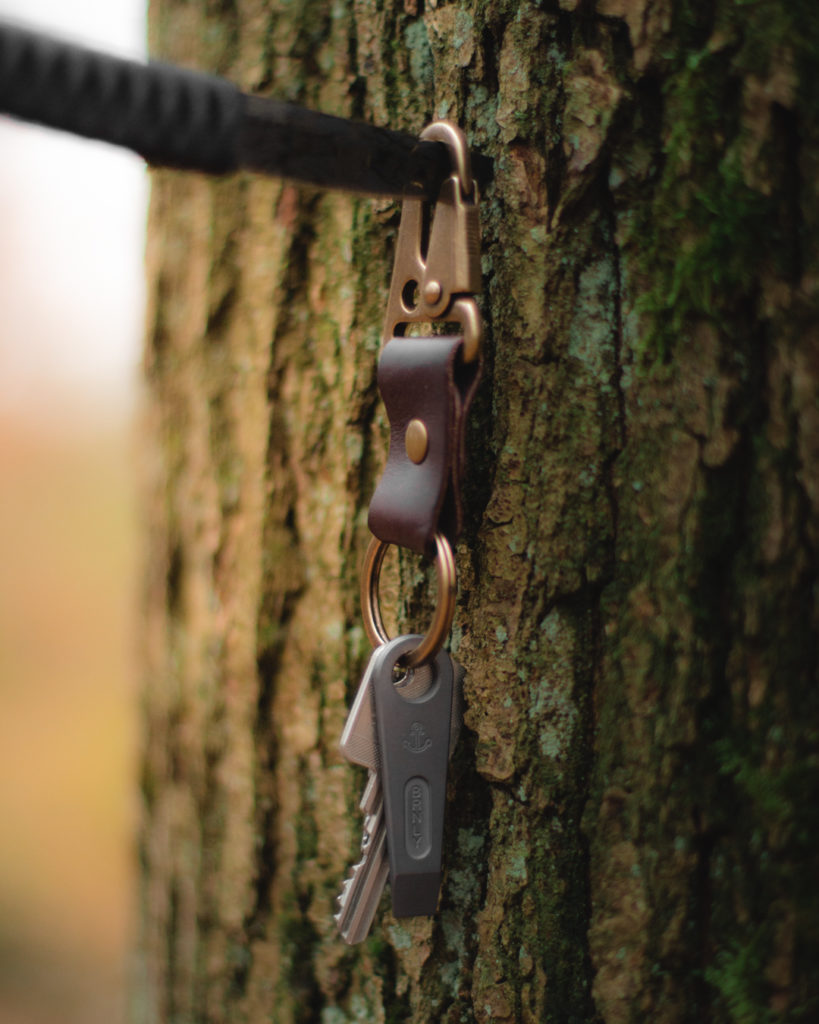
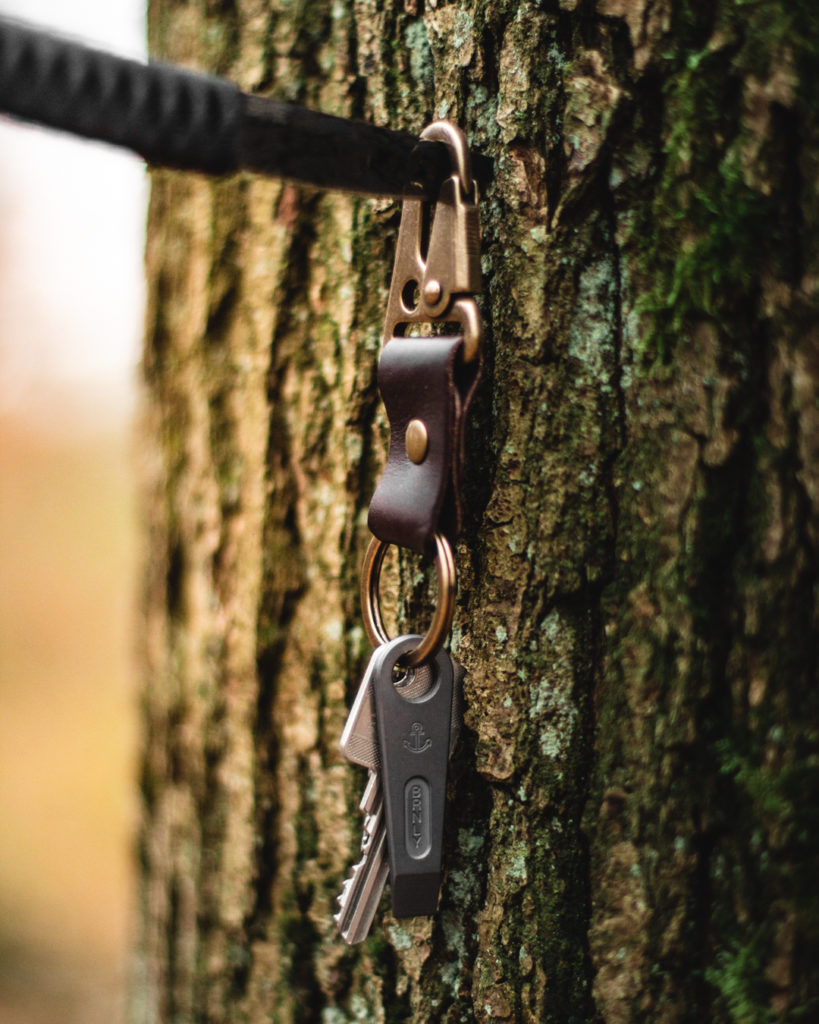
One last and very powerful slider I would like to address is the Clarity slider. In theory, the Clarity slider adds contrast to the mid-tones of your image, but what it effectively does is it makes textures and contours pop!
Image by @raven_the_pirate
Image by @raven_the_pirate
Here’s the same image with -50 and +50 Clarity, just to emphasize the effect.
If you think your image is a little “meh” and looks flat then adjusting the Clarity slider will definitely give it a kick.
Now with all this being said, please use these sliders moderately, usually some small adjustments are all you need. It’s easy to be impressed by the effect the sliders have and before you know it you’ve cranked them up to 100 and your image looks like someone tried to capture an alien ship with an infrared camera.
Try to get as close to the final image as you possibly can in camera and only use these global adjustments to finetune the last 10 percent. This way you’ll maintain a more natural and more pleasing look.
Up next: Post-Processing – Local Adjustments
4 thoughts on “EDC Photography: Part 4 – Post-Processing – Global Adjustments”